Chocolate Carrot Cake Recipe (Gluten-Free)
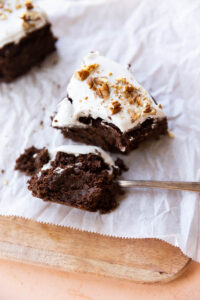
Chocolate Carrot Cake is soft and tender with a light and airy coconut cream frosting. It has a rich and decadent chocolate flavor with all the traditional carrot cake spices like ginger, nutmeg, and cinnamon. Enjoy this cake year-round on holidays, birthdays, or whenever you're craving something sweet!
Equipment
- 1 9" Round Baking Pan
Ingredients
Wet Ingredients
- 2 Cups Shredded Carrots
- 2 Eggs
- ¾ Cup Coconut Sugar
- ½ Cup Coconut Milk Or any dairy-free milk.
- 1 Teaspoon Vanilla Extract
Dry Ingredients
- 1+½ Cups Almond Flour
- 1 Cup Cacao Powder
- 2 Teaspoons Cinnamon
- 1+½ Teaspoon Baking Powder
- ½ Teaspoon Baking Soda
- ½ Teaspoon Ground Ginger
- ½ Teaspoon Ground Nutmeg
- ¼ Teaspoon Clove
- ¼ Teaspoon Salt
Coconut Cream Frosting
- 13.5 Ounces Full Fat Coconut Milk It must be chilled. You will only need the THICK part at the top of the can.
- 2 Tablespoons Powdered Sugar You can also use 1 tablespoon of maple syrup.
- 1 Teaspoon Vanilla Extract
Instructions
- Start by adding almond flour, cacao powder, spices, and salt into a mixing bowl. Whisk together until fully combined.
- Next, add shredded carrots, eggs, coconut sugar, coconut milk, and vanilla extract into a large bowl.
- Pour the flour mixture into the wet mixture and stir together until all flour has been absorbed.
- Pour the cake batter into a greased 9" round baking pan. Bake at 350 degrees for about 30 minutes. Check with a toothpick - if it comes out clean, the cake is done baking.
- Let the cake cool completely before carefully removing it from the baking pan.
Coconut Cream Frosting
- For frosting, add ONLY the thick part of the full fat coconut milk can into a mixing bowl with powdered sugar and vanilla extract. Blend on high with a hand or stand mixer until thick and creamy. (About 2-3 minutes.)
- Frost the cake with a small spatula or the back of a spoon and top with crushed walnuts!
Notes
** Nutrition facts do not include the coconut cream frosting & walnuts.
Expert Tips
- Do not pack the cacao powder into the measuring cup. Spoon it in and use a knife to scrape off the excess.
- Let the cake cool completely before frosting the cake.
- To easily remove the cooled cake, use parchment paper at the bottom of the baking pan and grease the edges with coconut oil or a non-stick spray.
- If you want to use pre-made dairy-free frosting, I recommend Simple Mills or Miss Jones.
- To make a layer cake, you can double the recipe or use two smaller 6" cake pans.
How To Store Leftovers
The cake with or without frosting stores best in the refrigerator. After about 5 days I would transfer any leftovers into an airtight glass container in the freezer. To defrost, just place the frozen cake in the refrigerator the night before. **See full post for more information and step by step photos.Nutrition
Serving: 1ServingCalories: 253kcalCarbohydrates: 34gProtein: 8gFat: 13gSaturated Fat: 2gPolyunsaturated Fat: 0.3gMonounsaturated Fat: 1gTrans Fat: 0.004gCholesterol: 41mgSodium: 261mgPotassium: 287mgFiber: 7gSugar: 22gVitamin A: 5407IUVitamin C: 2mgCalcium: 131mgIron: 3mg
Did you make this recipe?Tag @freshwaterpeaches on Instagram!