Dairy-Free Vanilla Ice Cream Recipe
This Dairy Free Vanilla Ice Cream has a smooth and creamy texture right out of the ice cream maker! It takes about 5 minutes to prepare, and you only need 6 simple ingredients to make it.
Equipment
- 1 High Speed Blender I used a Vitamix Blender, but any blender will work!
- 1 Ice Cream Maker I used the Cuisinart 1.5 quart ice cream maker.
Ingredients
- 13.5 Ounces Full Fat Coconut Milk
- 1 Cup Filtered Water
- ½ Cup Raw Cashews You'll need to soak them in water for 1-2 hours.
- ¼ Cup Pure Maple Syrup
- 1 Tablespoon Coconut Sugar
- 1+½ Tablespoons Vanilla Paste You can swap for a high-quality vanilla extract.
- ¼ Teaspoon Salt
Instructions
- Start by soaking the cashews in filtered water for 1-2 hours. When they're done soaking, drain the water.
- Next, add soaked cashews, fresh filtered water, full fat coconut milk, maple syrup, coconut sugar, vanilla paste, and salt into a blender.
- Blend the mixture on high for about 60-90 seconds then turn to a low setting and blend for about 15 seconds to remove foamy bubbles on the top.
- Pour the vanilla ice cream mixture into the ice cream maker and churn for about 20-25 minutes.
- Finally, transfer the ice cream mixture to a freezer safe container and store in the refrigerator until you're ready to serve!
Notes
Expert Tips
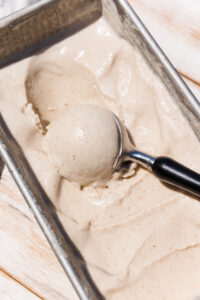
- When it comes out of the ice cream maker it has more of a soft serve consistency, but you can transfer it into a container and freeze for 30-60 minutes for firmer consistency.
- The ice cream base for the Cuisinart Ice Cream Maker must be stored in the freezer for 24 hours prior to making the ice cream.
- On a hot summer day this ice cream will melt quickly once removed from the ice cream maker. I recommend freezing longer so it can harden before scooping.
- For best results, I recommend using an electric ice cream maker, but you can use a no churn method by freezing the mixture for 6-8 hours or overnight.
How to Store Leftovers
Store leftover ice cream in an airtight container in the freezer. If the container does not have a cover, it will get freezer burn. Leave the ice cream at room temperature for about 10-15 minutes before serving. ** See full post for more information and step by step photos!Nutrition
Serving: 1ServingCalories: 213kcalCarbohydrates: 18gProtein: 2gFat: 14gSaturated Fat: 10gPolyunsaturated Fat: 1gMonounsaturated Fat: 2gSodium: 82mgPotassium: 181mgFiber: 0.3gSugar: 14gVitamin C: 1mgCalcium: 24mgIron: 2mg
Did you make this recipe?Tag @freshwaterpeaches on Instagram!