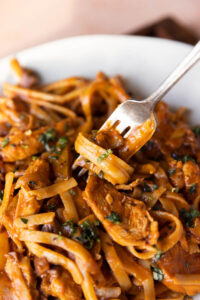
Easy Spicy Chicken Pasta Recipe
If you're short on time, try this Easy Spicy Chicken Pasta Recipe! It comes together in less than an hour and it's perfect for busy weeknights.
Equipment
- 1 Large Pan
Ingredients
- 1 Pound Chicken Breast
- 24 Ounces Tomato Sauce I used Primal Kitchen Dairy-Free Vodka Sauce.
- 12 Ounces Gluten-Free Pasta I used Jovial Brown Rice Fettucine, but any pasta will work!
- 3 Bell Peppers, Sliced Thinly
- 1 Sweet Onion, Sliced Thinly
- 1 Cup Pasta Water
- 2-4 Cloves of Garlic, Chopped
- 2 Tablespoons Extra Virgin Olive Oil
- 1 Teaspoon Salt
- ½ Teaspoon Paprika
- ½ Teaspoon Cayenne Pepper
- ½ Teaspoon Garlic Powder
Optional
- ¼ Cup Chopped Kalamata Olives
Instructions
- Start by adding the chicken breast into a large bowl with salt, paprika, cayenne pepper, garlic powder, and 1 tablespoon of olive oil. Stir well until chicken is completely coated in the spices.
- Next, add the chicken to preheated skillet. Cook on medium-high heat for about 8 minutes on each side or until cooked through. Place the cooked chicken on a plate to rest.
- Then add about a tablespoon of olive oil to the pan with the sliced bell peppers, onion, and fresh garlic. Cook on medium-low covered until the onions are caramelized.
- Next, add the sliced chicken back into the pan with tomato sauce
- Cook the gluten-free pasta according to package directions, and then add the cooked pasta into the skillet with the onions, peppers, sliced chicken, tomato sauce, and about a cup of pasta water. Stir well and serve hot!
Notes
Expert Tips
- For maximum flavor, let the tomato sauce simmer with the vegetables and chicken before adding in the pasta.
- Marinate the chicken overnight or the morning of to increase the flavor and save on prep time.
- Cut the chicken after it has cooked to keep it juicy and tender. Overcooking the chicken will make it dry.
- Use a meat thermometer if you're not sure when the chicken is ready! Check that the internal temperature is 165 degrees.
- Any large pan will work with this recipe, but I love using a stainless-steel skillet with taller sides.
- To save on time, use a rotisserie chicken. Chop the meat and stir into the pasta dish.
- Cook gluten-free pasta until al dente to avoid mushy pasta.
How To Store Leftovers
Leftovers can be stored in an airtight container in the refrigerator for up to 5 days. ** See full post for more information and step by step photos.Nutrition
Serving: 1ServingCalories: 590kcalCarbohydrates: 83gProtein: 36gFat: 14gSaturated Fat: 3gPolyunsaturated Fat: 2gMonounsaturated Fat: 7gTrans Fat: 0.01gCholesterol: 73mgSodium: 1711mgPotassium: 1230mgFiber: 7gSugar: 14gVitamin A: 3826IUVitamin C: 132mgCalcium: 60mgIron: 4mg
Did you make this recipe?Tag @freshwaterpeaches on Instagram!